project1 목표
1. GitHub 시작해보기
2. SpringBoot - Jpa, DB 셋팅하기
3. DynamoDB 셋팅, 사용해보기
#1. Spring Boot 프로젝트 생성, Github 연동
- Spring Boot 프로젝트를 생성한다
- Github Respository에 프로젝트를 연동한다.
Step 1. Spring Boot 프로젝트 생성하기
1. Spring Initializr 에서 프로젝트 설정하기 : https://start.spring.io/
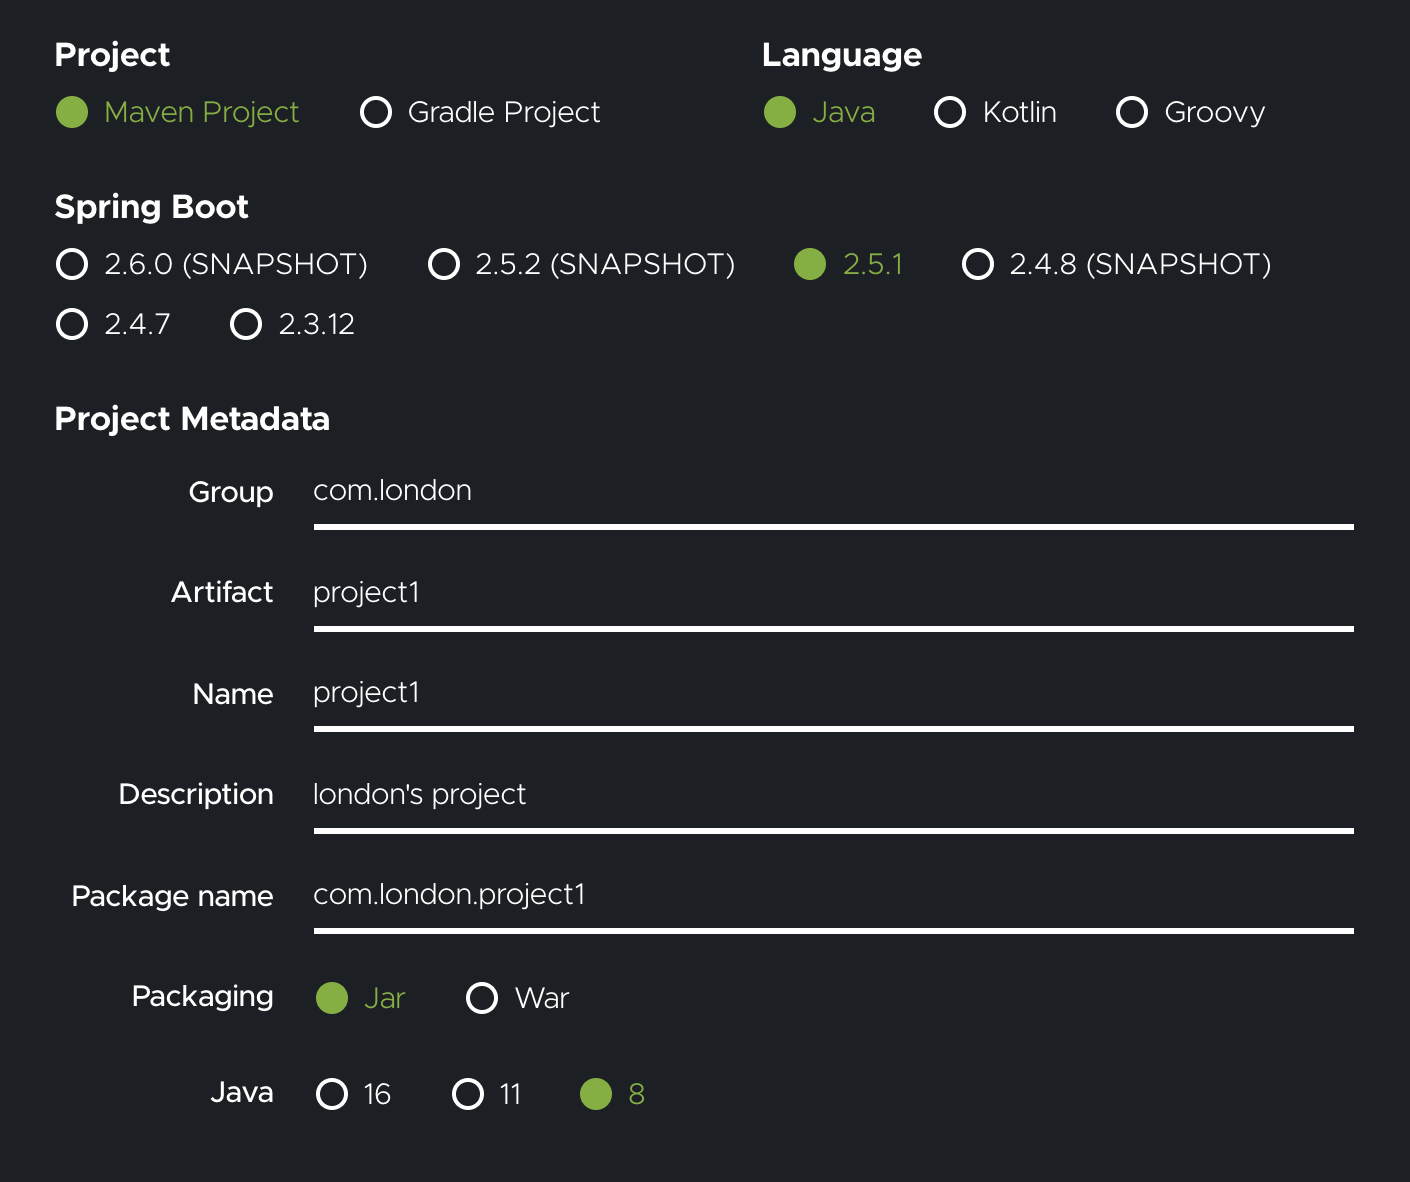
- GroupId : GroupId는 자신의 프로젝트를 식별해주는 고유 아이디.
- ArtifactId : ArtifactId는 버전 정보를 생략한 이름(jar).
2. 다운로드 후 IDE에서 열기

3. Maven Install & Application Start

톰캣 포트까지 나와야지 잘 뜬것!
에러 케이스 ( 더보기 클릭 )
error case) Process finished with exit code 0

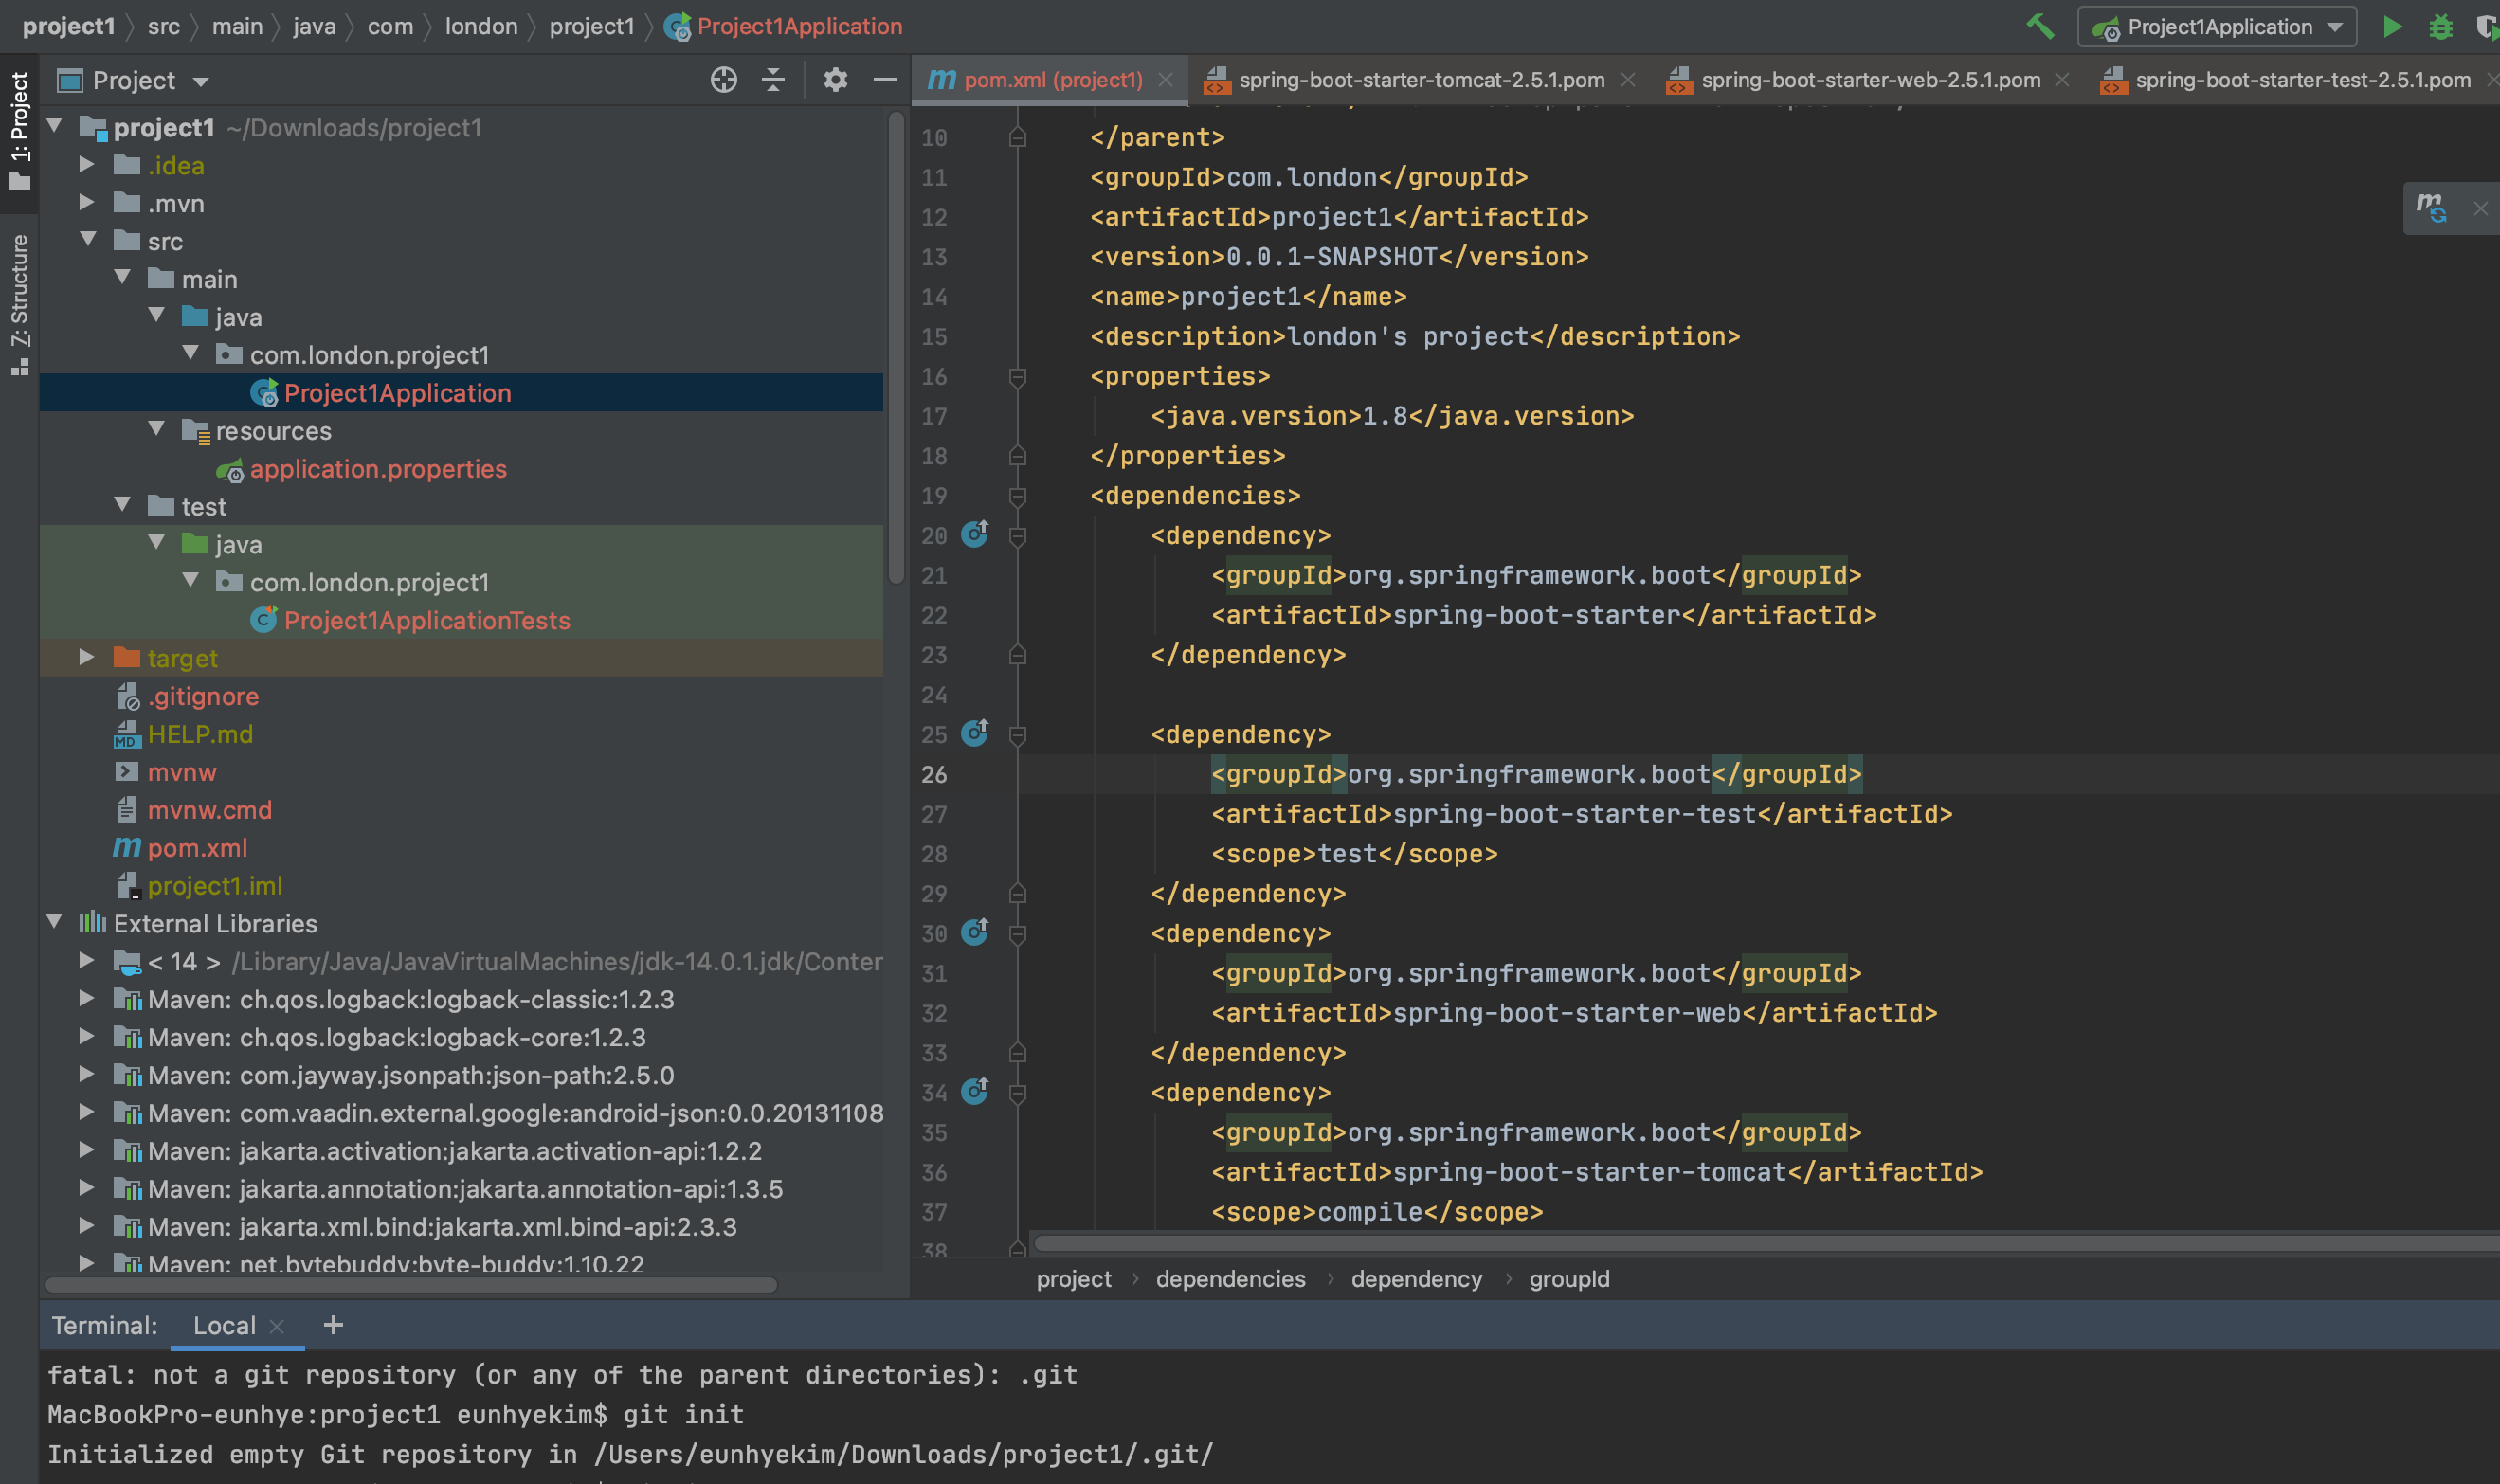
Spring Boot에는 내장 tomcat이 있는데 tomcat의 class path를 찾지못해서 나타난 문제
아래의 2개 디팬던시를 추가해 준다.
<dependency>
	<groupId>org.springframework.boot</groupId>
	<artifactId>spring-boot-starter-web</artifactId>
</dependency>
<dependency>
	<groupId>org.springframework.boot</groupId>
	<artifactId>spring-boot-starter-tomcat</artifactId>
	<scope>compile</scope>
</dependency>
Step 2. Github Repository 생성

Step 3. IntelliJ에서 Git 연동
1. git init 명령어 실행
> MacBookPro-eunhye:project1 eunhyekim$ git init
2. 파일 정리 ( ignore & add )
빨간색으로 표시된 파일 중 불필요 파일 선택 > 우클릭 > add .gitignore
빨간색으로 표시된 파일 중 필요 파일 선택 > 우클릭 > add

3. commit
> MacBookPro-eunhye:project1 eunhyekim$ git commit -m "initial commit"
4. remote 등록
> MacBookPro-eunhye:project1 eunhyekim$ git remote add origin https://github.com/eunhyekimkeh/london-web1.git
5. 브랜치 생성 및 push
> MacBookPro-eunhye:project1 eunhyekim$ git branch -M main
> MacBookPro-eunhye:project1 eunhyekim$ git push -u origin main
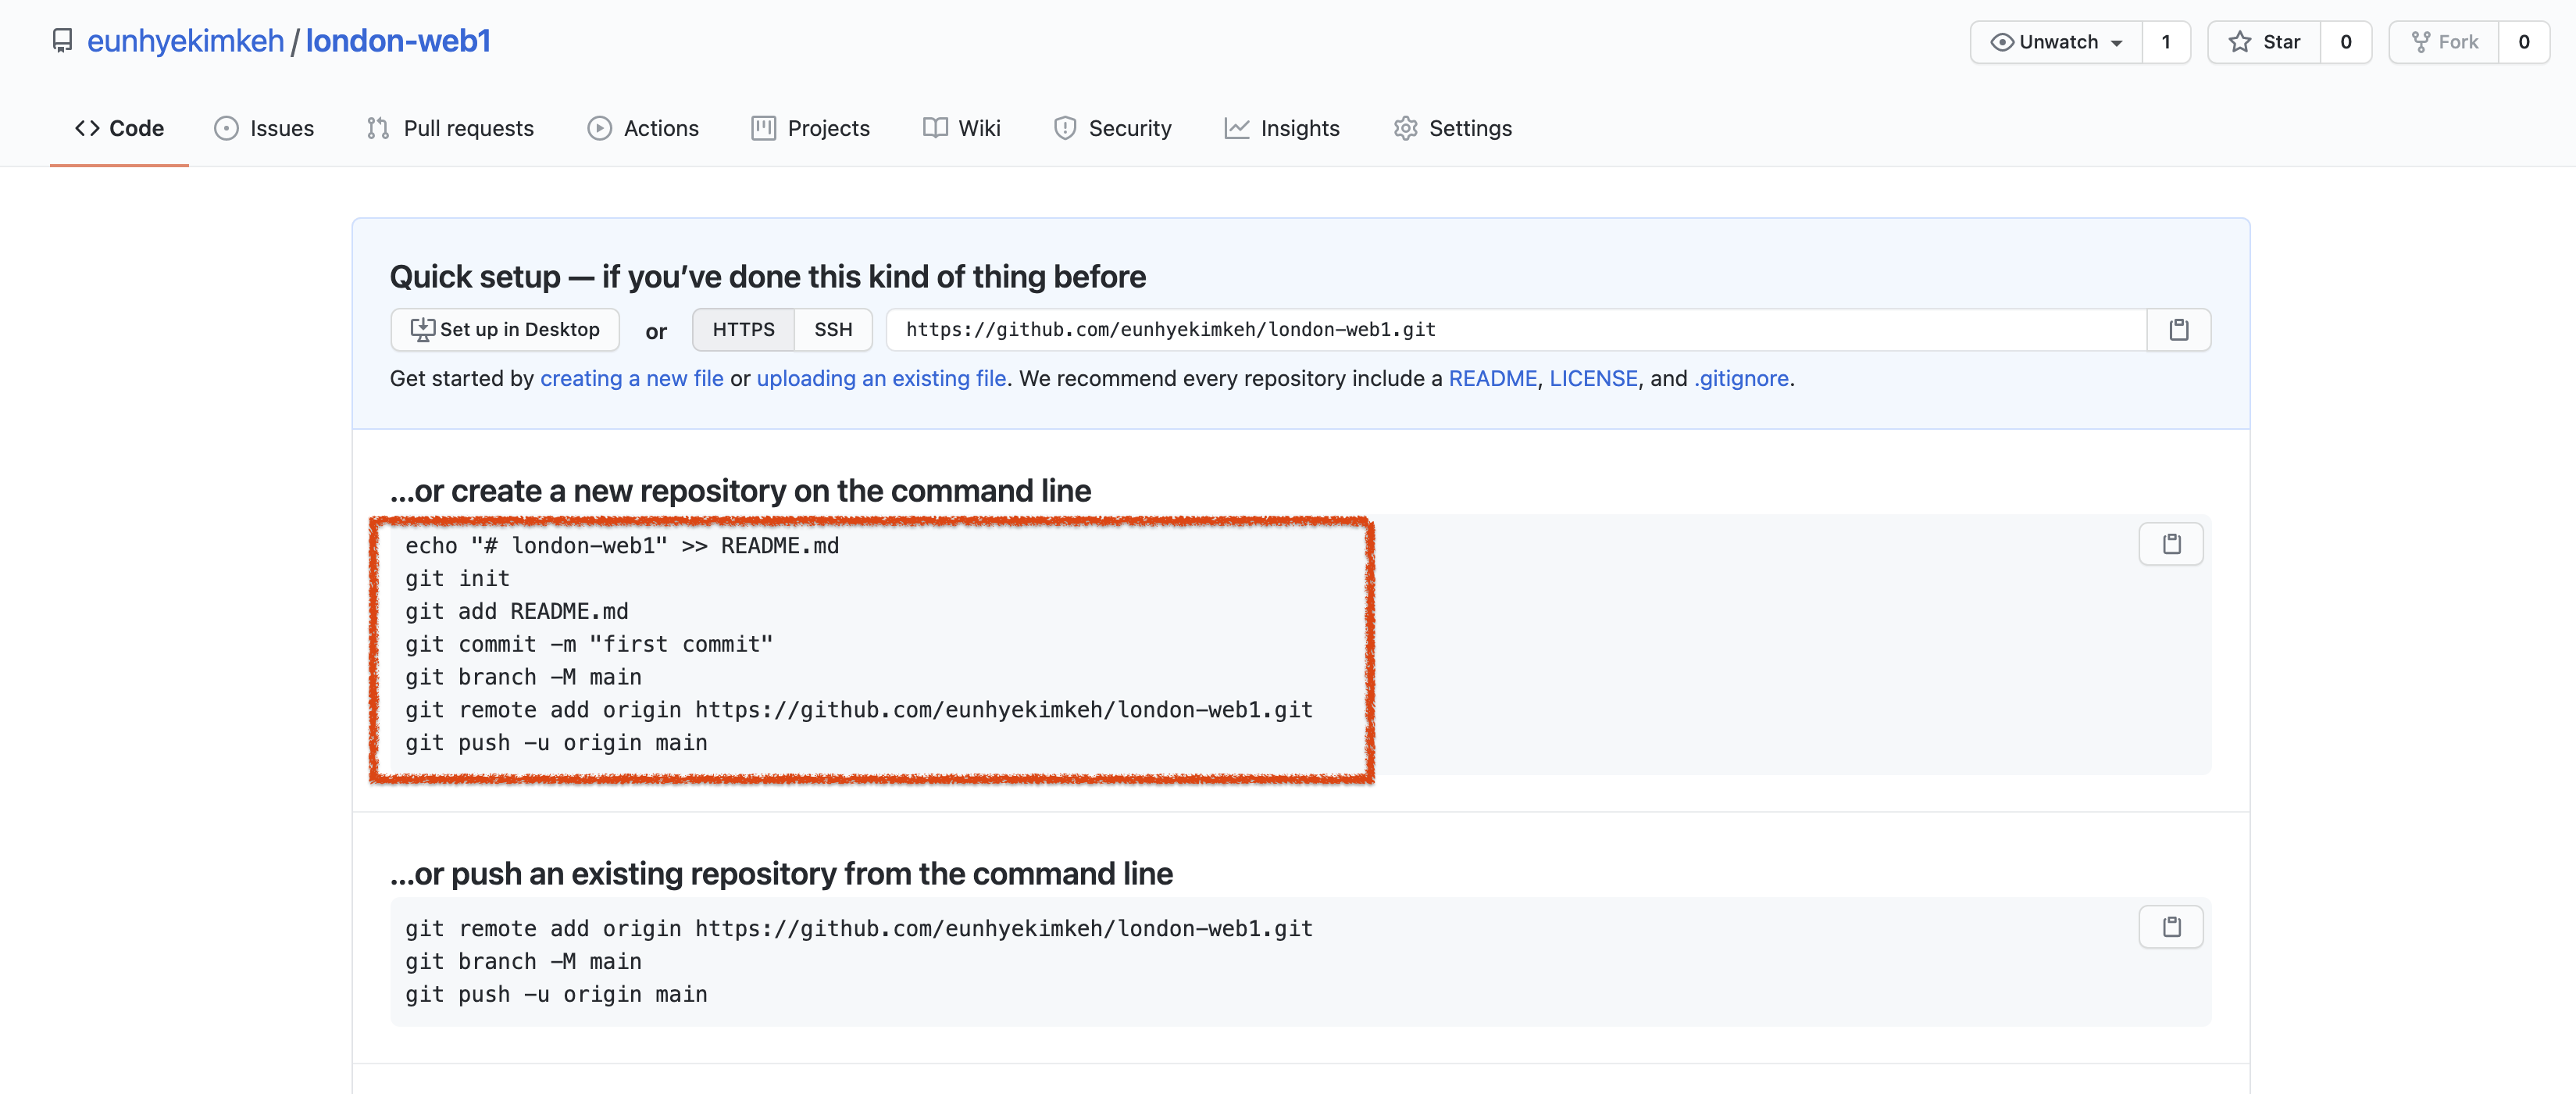
Git Repository 생성 후 나오는 화면의 안내를 따라하면된다.
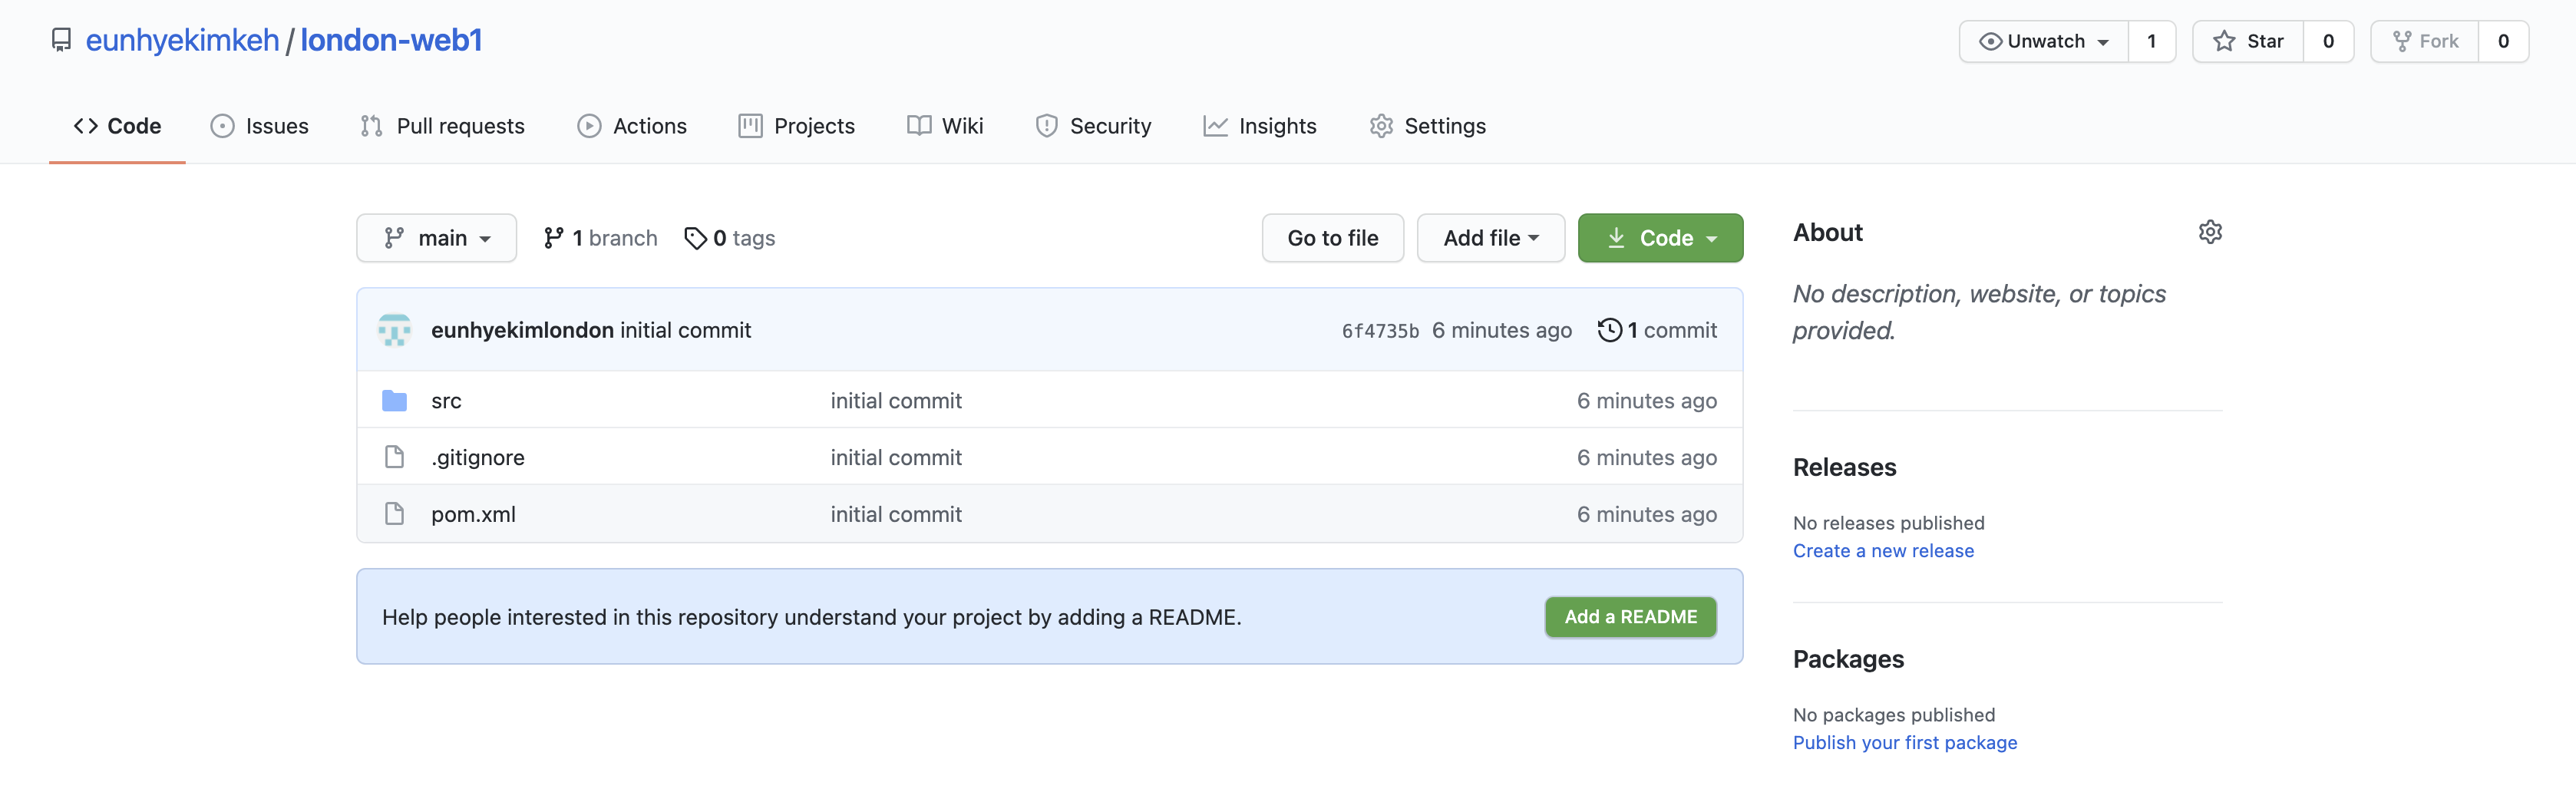
새로고침하면 화면에 코드가 나온다! 완성!
2021.06.21 - [Project] - London's GitHub project1 #1. Spring Boot 프로젝트 생성, Github 연동
2021.06.21 - [Project] - London's GitHub project1 #2. Local에 MySql 설치하기